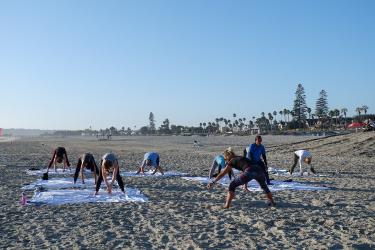
Nordic Walking Poles Transform Your Daily Walks Into Full-Body
You probably walk past people using those ski-pole-looking sticks and wonder what they’re doing. They’re not lost hikers who wandered into suburbia. They’re nordic walkers, and they’ve figured out something most of us miss: walking can work your entire body if you add two simple poles.
Nordic walking started in Finland during the 1930s when cross-country skiers needed a way to train during summer months. What began as off-season conditioning evolved into a standalone fitness activity that burns up to 46% more calories than regular walking. That’s not marketing fluff-it’s backed by research from the Cooper Institute.
What Makes Nordic Walking Different From Regular Walking
Regular walking primarily engages your lower body. Your legs do the work while your arms swing passively at your sides. Nordic walking changes this equation completely.
When you plant a pole and push against it, you activate your chest, shoulders, arms, and core muscles. Each stride becomes a pushing motion that propels you forward. Your lats engage - your triceps fire. Your obliques stabilize your torso.
The result? You transform a lower-body activity into genuine full-body exercise without increasing your perceived effort. Studies show that nordic walkers report similar exertion levels to regular walkers despite burning significantly more energy. Your heart rate increases by 5-17 beats per minute compared to conventional walking at the same pace.
How to Choose the Right Poles
Pole selection matters more than you’d expect. Get this wrong and you’ll struggle with technique or end up with sore wrists.
**Length is critical. ** Stand with your arm at your side, elbow bent at 90 degrees. The pole grip should reach your palm in this position. Most manufacturers offer a simple formula: multiply your height in centimeters by 0. 68. A 170cm person needs approximately 115cm poles.
**Fixed-length versus adjustable. ** Fixed poles weigh less and don’t rattle, but you’re stuck with one size. Adjustable poles let you fine-tune length and share with family members. For beginners, adjustable makes sense. Serious walkers often graduate to fixed-length carbon fiber options.
**Strap design separates good poles from junk. ** Look for straps that wrap around your wrist with a quick-release mechanism. You should be able to open your hand completely at the back of each stride without losing the pole. Cheap poles use simple loops that force you to grip constantly, which causes hand fatigue.
**Tip types matter for your terrain. ** Rubber tips work on pavement and hard surfaces. Remove them on trails to expose the carbide spike underneath for better traction on dirt and grass.
Budget around $50-80 for decent starter poles. Leki, Exerstrider, and Black Diamond all make reliable options. Avoid anything under $30-the straps and tips won’t hold up.
Master the Basic Technique in Five Steps
Nordic walking technique feels awkward for the first 20 minutes. Push through that initial weirdness - your body adapts quickly.
Step 1: Find Your Natural Arm Swing
Start walking without thinking about the poles. Just drag them behind you. Notice how your arms swing naturally opposite to your legs-left arm forward with right leg, right arm forward with left leg. This opposite-arm-opposite-leg pattern is already hardwired into your movement. You’re not learning something new; you’re amplifying what you already do.
Step 2: Plant and Push
As your arm swings forward, plant the pole tip at a 45-degree angle behind you. The tip should strike the ground roughly level with your back heel. Don’t reach forward with the pole-that’s the most common beginner mistake.
Once planted, push down and back against the pole as you stride forward. Think about pressing the pole into the ground rather than pulling yourself along.
Step 3: Open Your Hand
Here’s where proper straps pay off. At the end of your push, open your fingers completely. The strap keeps the pole with you while your hand relaxes. This open-hand release prevents the death grip that causes forearm fatigue and blisters.
Your hand closes again naturally as the arm swings forward for the next plant.
Step 4: Rotate Your Torso
Don’t walk with a rigid upper body. Allow your shoulders and hips to rotate naturally with each stride. This rotation engages your core muscles and increases your stride length without conscious effort.
Imagine a gentle twist through your midsection with each step. Your shoulders and hips should move in opposition-when your right shoulder rotates forward, your left hip does the same.
Step 5: Maintain Upright Posture
Keep your chest open and gaze forward, not down at your feet. The poles actually help with posture by preventing the hunched shuffle that happens during regular walking, especially when fatigue sets in.
Your weight should stay slightly forward, like you’re leaning into a gentle headwind. This forward lean, combined with active pole use, creates the propulsive quality that distinguishes nordic walking from just walking while holding sticks.
Common Mistakes and How to Fix Them
**Planting poles too far forward. ** When the pole tip lands ahead of your body, you brake with each stride instead of propelling yourself. The fix: keep poles angled backward. The tip never passes your front foot.
**Gripping too tight. ** White-knuckle pole holding exhausts your forearms within ten minutes. Trust your straps. Practice the open-hand release until it becomes automatic.
**Moving only your arms. ** Nordic walking isn’t about arm swinging-it’s about pushing. Engage your back muscles. Feel your lats working with each push. If your arms get tired but your back doesn’t, you’re doing it wrong.
**Going too fast too soon. ** Technique breaks down at high speeds. Spend your first two weeks focused on proper form at a comfortable pace. Speed comes naturally once the movement pattern is ingrained.
Building Your Nordic Walking Routine
Start conservative. Three 20-minute sessions during your first week gives your body time to adapt to using upper body muscles in this new way. You’ll likely feel soreness in your triceps, shoulders, and lats-muscles that regular walking ignores.
Week two, extend to 30-minute sessions. By week four, you can handle 45-60 minutes comfortably.
For calorie burning, intensity matters more than duration. Interval training works exceptionally well with nordic walking. Alternate three minutes of vigorous effort with two minutes of easy recovery. This approach elevates your heart rate effectively without the joint stress of running intervals.
Sample beginner schedule:
- Monday: 25 minutes, moderate pace
- Wednesday: 20 minutes with 5x30-second pushes
- Friday: 30 minutes, easy conversational pace
- Weekend: Optional longer walk, 45+ minutes
Why Nordic Walking Works Especially Well for Certain Groups
Seniors often find nordic walking transformative. The poles provide stability that reduces fall risk while simultaneously building the upper body and core strength that prevents falls in the first place. It’s rehabilitation and prevention wrapped into one activity.
People recovering from knee or hip issues appreciate the reduced joint loading. The poles absorb some impact and redistribute effort across more muscle groups. Walking becomes easier, not harder.
Those who find regular walking boring often stick with nordic walking longer. The technique focus keeps your mind engaged. You’re not just shuffling forward-you’re coordinating a full-body movement pattern.
And for anyone wanting efficient calorie burn without high-impact stress, the math is compelling. You get cardio benefits approaching jogging while keeping both feet close to the ground.
Getting Started This Week
You don’t need perfect poles to begin. Borrow a pair or start with budget-friendly options. Find a flat, paved path for your first few sessions while you nail the technique.
Watch a few YouTube videos from certified nordic walking instructors-INWA (International Nordic Walking Federation) has official tutorials. Better yet, find a local class. Many community recreation centers and senior centers offer introductory sessions.
Give yourself two weeks before judging whether this is for you. The coordination clicks somewhere around session five or six for most people. Before that point, you’re still thinking about technique. After it, you’re just walking.
Those ski poles aren’t so strange after all. They’re just tools that turn your daily walk into something your whole body benefits from.