Glucose Monitors for Non-Diabetics: Fitness Tracking Revolution
You might think continuous glucose monitors belong in the medical supply aisle, reserved for diabetics managing insulin. Not anymore.
Athletes, biohackers, and regular gym-goers now strap these tiny sensors to their arms. They’re tracking how meals affect their energy, sleep, and workout performance. The technology that once meant survival for millions has become an optimization tool for anyone curious about metabolic health.
What Continuous Glucose Monitors Actually Do
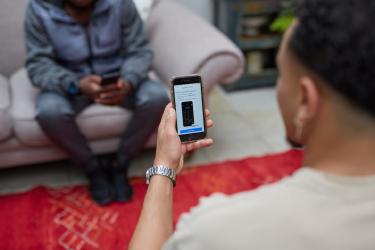
A CGM is a small sensor, typically worn on the back of your upper arm, with a thin filament that sits just under your skin. It measures glucose in interstitial fluid every few minutes and sends readings to your phone.
For diabetics, this data prevents dangerous blood sugar crashes and spikes. For non-diabetics, the same information reveals something different: how your body uniquely responds to food, stress, exercise, and sleep.
Here’s what surprised me when I tried one. A banana spiked my glucose higher than a slice of pizza. Walking after dinner flattened my post-meal curve dramatically. And poor sleep made my fasting glucose look terrible the next morning.
That’s the appeal. You get personalized data instead of generic nutrition advice.
How to Get Started with CGM Fitness Tracking
Step 1: Choose Your Device
Several companies now market CGMs to non-diabetics:
- Levels pairs the Abbott Freestyle Libre sensor with their app and coaching
- Nutrisense uses the same hardware with registered dietitian support
- Signos focuses specifically on weight loss applications
- Supersapiens targets endurance athletes (currently Europe only)
Costs run between $150-400 monthly depending on subscription tier and coaching access. None require a prescription in most markets, though some services include telehealth consultations as part of onboarding.
Pick based on your goals - want weight management guidance? Signos emphasizes that angle - training for an ultramarathon? Supersapiens built their entire platform around athletic fueling.
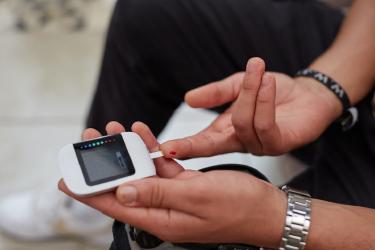
Step 2: Apply the Sensor Correctly
This part intimidates newcomers - don’t let it.
The sensor applicator looks aggressive but the insertion is quick-less painful than a flu shot. You press the applicator firmly against your arm and click. A spring-loaded mechanism inserts the filament instantly.
Common mistakes to avoid:
- **Picking a spot with too little fat. ** The sensor needs subcutaneous tissue. Too lean means inaccurate readings - - **Applying after showering. ** Wet skin won’t hold the adhesive. Dry your arm completely. - **Compressing the sensor while sleeping. ** If you sleep on that arm, the pressure creates false low readings. Choose your non-dominant arm.
Most sensors last 14 days. Some people add adhesive patches over the sensor for extra security during sweaty workouts or swimming.
Step 3: Establish Your Baseline
Spend the first 3-4 days eating normally. Don’t try to impress the sensor. You need honest data.
Track your typical breakfast, your usual lunch, your regular snacks. Note your glucose patterns during work stress, after coffee, following workouts.
Most apps show your glucose as a continuous graph overlaid with meal logs and activity. You’ll start seeing patterns within days.
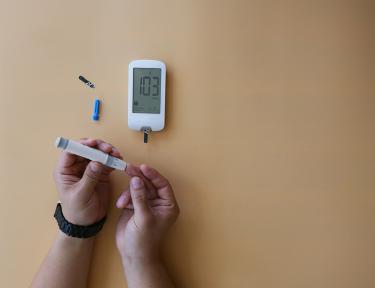
My baseline revealed I’m what researchers call a “high responder” to refined carbohydrates. A bowl of white rice sent my glucose from 85 to 165 mg/dL. The same calories from steak and vegetables? Barely a ripple.
Step 4: Run Personal Experiments
This is where CGM tracking gets interesting.
Test one variable at a time:
**Meal composition experiments. ** Eat the same carbohydrates with and without protein or fat. Notice how pairing bread with butter or eggs changes your response compared to bread alone. The difference can be dramatic-adding fat slows gastric emptying and blunts glucose spikes.
**Meal timing experiments. ** Try eating your largest meal at lunch versus dinner. Many people discover they tolerate carbohydrates better earlier in the day when insulin sensitivity peaks.
**Exercise timing experiments. ** Check your glucose during morning fasted workouts versus afternoon sessions after eating. Track how different workout types (strength vs. cardio) affect your curve. A 15-minute walk after meals consistently drops glucose faster than sitting-this one’s almost universal.
**Sleep experiments. ** Track fasting glucose after six hours of sleep versus eight. Poor sleep tanks insulin sensitivity for most people. Seeing the numbers makes the abstract advice suddenly concrete.
Making Sense of Your Numbers
Here’s where non-diabetic CGM use gets controversial.
No medical consensus exists on optimal glucose ranges for healthy people. The targets diabetics aim for (time between 70-180 mg/dL) were designed to prevent acute complications, not improve athletic performance.
Companies marketing CGMs to non-diabetics often suggest tighter ranges. Levels promotes keeping glucose between 70-110 mg/dL and limiting post-meal spikes to under 30 mg/dL rises.
But these numbers come from observation and theory, not clinical trials proving better outcomes.
What we do know:
- **Large glucose swings correlate with energy crashes. ** If you spike to 160 then crash to 75, you’ll probably feel lousy during the crash. - **Chronically elevated glucose drives inflammation. ** This matters more for metabolic health than occasional spikes after birthday cake. - **Individual variation is massive. ** The same banana creates vastly different responses in different people.
Focus less on hitting exact numbers and more on understanding your patterns. Which foods work for you - which situations tank your stability?
What CGM Data Won’t Tell You
Glucose is one metabolite among many. Tracking it obsessively can create tunnel vision.
A meal might spike your glucose but deliver essential micronutrients. Fruit creates higher glucose responses than candy bars sometimes, but nobody serious argues candy bars are healthier.
And the stress of constant monitoring can backfire. I’ve talked to people who developed genuine anxiety around eating after watching every meal get scored by an algorithm. That’s not health optimization-that’s orthorexia with a tech veneer.
Use CGM data as information, not judgment. Some meals will spike your glucose. You’ll eat them anyway because they’re delicious, or social, or convenient. That’s fine. The goal is awareness, not perfection.
Practical Tips for Athletes
Endurance athletes have specific applications for blood sugar tracking.
**Pre-workout fueling. ** Find which carbohydrate sources give you sustained energy without a crash mid-workout. For long efforts, you want stable glucose, not a spike-and-crash pattern.
**Intra-workout nutrition. ** During extended training, watch how gels, drinks, and real food affect your glucose. Some athletes discover they tolerate certain products better than others.
**Recovery windows. ** Glucose uptake increases after exercise when muscles are primed to replenish glycogen. CGMs can help you time recovery nutrition effectively.
**Taper periods. ** Many athletes see their glucose patterns change during taper weeks when training volume drops but eating habits don’t. Interesting data if you’re curious about metabolic efficiency.
Is This Worth It?
Honest answer: depends on your curiosity and budget.
If $200-400 monthly isn’t significant to you and you genuinely find data motivating, a few months of CGM tracking teaches you things about your metabolism no other tool provides. The insights often persist after you stop wearing the sensor.
If money’s tight or you tend toward health anxiety, skip it. The fundamentals work fine without fancy tracking-eat mostly whole foods, move regularly, sleep enough, manage stress. A CGM won’t change those basics.
For athletes training seriously, the investment might make more sense. Dialing in race nutrition or understanding training fuel needs can justify the cost if competition matters to you.
But for general fitness - call it useful but optional. The revolution is real, but it’s not required.