Continuous Glucose Monitors Guide Your Food Choices

Your morning oatmeal might spike your blood sugar more than a chocolate chip cookie. Sounds backwards, right? But that’s exactly what continuous glucose monitors are revealing about individual metabolism.
CGMs-small sensors worn on your arm that track blood sugar in real time-were once reserved for diabetics. Now they’re becoming a mainstream tool for anyone curious about how food actually affects their body. Not how it affects “most people” according to some study. How it affects you.
What a CGM Actually Tells You
A continuous glucose monitor measures interstitial glucose (the sugar in fluid between your cells) every few minutes. You get a constant stream of data showing how your blood sugar rises and falls throughout the day.
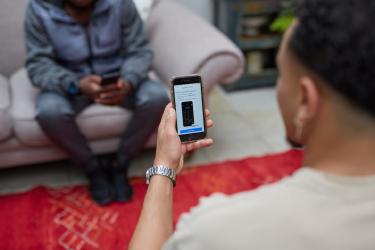
The readings appear on your phone as a graph. Eat breakfast, watch the line climb. Go for a walk, see it drop. The visual feedback is immediate and surprisingly addictive.
Here’s what you’re looking for:
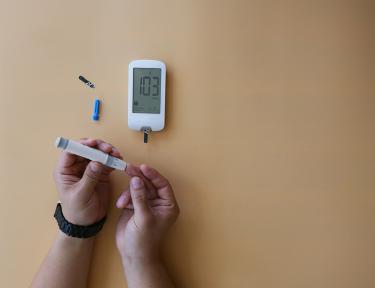
Baseline glucose: Your fasting number, typically between 70-100 mg/dL
Post-meal spikes: How high your glucose climbs after eating (ideally under 140 mg/dL)
Time to return: How quickly you get back to baseline (faster is better)
Variability: Large swings throughout the day stress your system more than steady levels
The goal isn’t achieving perfect flat lines. Some rise after meals is normal and healthy. You’re watching for excessive spikes, prolonged elevations, or patterns that don’t serve your energy and health goals.
Setting Up Your CGM Experiment
Step 1: Choose Your Device
Three main options exist for non-diabetics:
Freestyle Libre costs around $75 per sensor (lasts 14 days) and doesn’t require a prescription in most states. It’s the budget-friendly entry point.
Dexcom G7 offers more accurate readings but runs about $300 monthly. Some insurance covers it.
Subscription services like Levels, Nutrisense, or Signos pair CGM hardware with coaching and app features. Expect $200-400 monthly.
Start with the cheapest option. Fancy apps won’t matter if you abandon the experiment after two weeks.
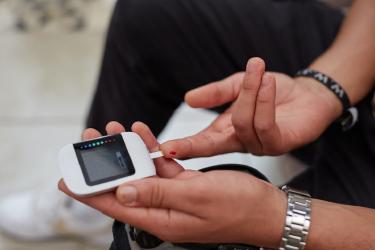
Step 2: Apply the Sensor Correctly
Most sensors attach to your upper arm. The application involves a small needle that inserts a thin filament under your skin-sounds scary, feels like a brief pinch.
Critical tips:
- Clean the area with alcohol and let it dry completely
- Apply over muscle, not fat deposits, for better accuracy
- Use overlay patches (sold separately) if you’re active or shower frequently
- The first 24 hours often show erratic readings while the sensor stabilizes
Step 3: Log Everything for Two Weeks
This is where people mess up. They slap on a sensor and watch passively.
Don’t do that.
Create a simple log capturing:
- What you ate (specific portions matter)
- When you ate
- Your activity before and after
- Sleep quality the night before
- Stress level that day
Without context, your glucose data means nothing. That random spike at 2pm? Could be the banana you ate. Could be the stressful email you received. Could be the poor sleep from two nights ago finally catching up.
Running Food Tests That Actually Work
Test One Food at a Time
Eat your test food in isolation, on an empty stomach, with nothing else. Wait at least 3 hours since your last meal.
Why so strict? Because food combinations dramatically change glucose response. Eating bread alone versus bread with butter produces different curves. You need clean data first.
Start with foods you eat regularly:
- Your usual breakfast
- That afternoon snack you grab daily
- Your go-to restaurant order
Test each one twice on different days. Bodies aren’t perfectly consistent-you want to confirm patterns.
Test Timing and Order
Once you know how individual foods affect you, experiment with modifications:
**Eat protein first. ** Having chicken before rice often blunts the rice spike significantly.
**Add fat. ** Butter on bread slows glucose absorption compared to plain bread.
**Walk after eating. ** Even 10 minutes can cut peak glucose by 20-30%.
**Try vinegar. ** A tablespoon of apple cider vinegar before meals reduces spikes for many people (though not everyone).
Track Your Personal Triggers
After two weeks, you’ll spot patterns. Common discoveries:
- Certain “healthy” foods spike you hard (fruit, oatmeal, and rice are frequent culprits)
- Some “bad” foods barely register (full-fat dairy, dark chocolate)
- Sleep deprivation makes everything worse
- Stress elevates glucose independent of food
- The same food affects you differently at breakfast versus dinner
Make a simple list: foods that work for you, foods that don’t, and foods that depend on context.
Making Changes Based on Your Data
Don’t Eliminate-Modify
Seeing a food spike your glucose doesn’t mean you can never eat it again. Think like an engineer troubleshooting a system.
Rice spikes you? Try:
- Smaller portions
- Pairing with protein and vegetables
- Eating it at lunch instead of dinner
- Cooling it first (creates resistant starch)
- Walking immediately after
One of these modifications usually solves the problem.
Prioritize the Big Wins
Focus on foods you eat daily or several times weekly. Optimizing your Tuesday donut matters less than optimizing your daily breakfast.
Also prioritize based on spike severity. A food pushing you to 180 mg/dL deserves more attention than one hitting 145.
Build Your Personal Food List
Create two categories:
Free foods: Meals that keep you stable regardless of timing or portion. Eat these when you want steady energy or need to recover from previous dietary chaos.
Context-dependent foods: Items that work under specific conditions. Note those conditions.
This beats any generic diet plan because it’s calibrated to your biology.
Common Mistakes and How to Fix Them
Obsessing over every spike: Some elevation after meals is normal. Chasing perfectly flat glucose creates stress-which itself raises glucose. Focus on patterns, not individual readings.
Ignoring non-food factors: Poor sleep can raise fasting glucose by 10-20 points. Acute stress triggers glucose release from your liver. Don’t blame breakfast for what insomnia caused.
Testing too many variables: Changed three things and your glucose improved? Great-but which change worked? Modify one variable at a time.
Forgetting about satiety: A food might not spike glucose but leaves you hungry an hour later. Blood sugar stability matters, but so does feeling satisfied.
Stopping too early: Two weeks gives you initial insights. Real optimization takes 2-3 months as you test modifications and build your personal database.
When CGM Data Warrants Medical Attention
Consult a doctor if you consistently see:
- Fasting glucose above 100 mg/dL
- Post-meal spikes exceeding 180 mg/dL
- Glucose remaining elevated for 3+ hours after eating
- Episodes below 70 mg/dL with symptoms (shakiness, confusion)
These patterns suggest metabolic issues beyond dietary tweaking.
The Practical Bottom Line
CGMs won’t tell you what to eat. They’ll show you what happens when you eat specific foods. That distinction matters.
The person insisting oatmeal is the healthiest breakfast isn’t wrong-for them. But your glucose might disagree. The only way to know is measuring your own response.
Start with a two-week experiment - test your regular foods. Identify your personal spikes. Then modify strategically rather than following generic advice.
Your metabolism is as unique as your fingerprint. It’s about time your diet reflected that.