Blood Glucose Monitoring for Athletes: Beyond Diabetes Management
You’ve probably seen professional cyclists or elite triathletes wearing small white patches on their arms during training. Those are continuous glucose monitors, and they’re not diabetic. They’re tracking real-time fuel data to squeeze every last bit of performance from their bodies.
This technology has quietly moved from medical necessity to competitive advantage. And you don’t need to be a Tour de France contender to benefit from it.
What a CGM Actually Tells You
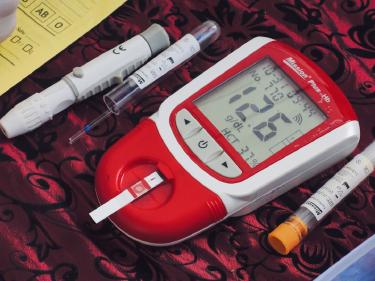
A continuous glucose monitor reads interstitial glucose levels every few minutes through a tiny sensor under your skin. The device transmits this data to your phone, showing you a continuous curve rather than isolated snapshots.
For athletes, this matters because glucose is your primary fuel during high-intensity work. When blood glucose drops too low, you bonk. When it spikes and crashes, your energy becomes unpredictable. A CGM lets you see these patterns happening in real time.
The data reveals things you’d never notice otherwise. Maybe your pre-workout banana causes a massive spike followed by a crash right when your interval session gets hard. Or perhaps that sports drink you’ve been using sends your glucose on a roller coaster while a different brand keeps things stable.
Setting Up Your Monitoring System
Step 1: Choose Your Device
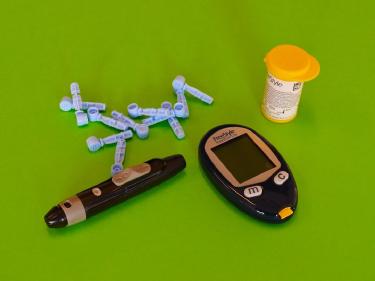
Several CGM options exist for non-diabetic users. Dexcom and Abbott’s Libre are the most common. Some companies like Supersapiens (before they shut down) and Levels have packaged these medical devices with athletic-focused software.
Here’s the practical reality: getting a CGM without a diabetes diagnosis can be tricky. Some telehealth services prescribe them for metabolic health. Others require you to work with a sports medicine physician. Expect to pay $150-300 monthly out of pocket since insurance won’t cover “performance” use.
Step 2: Apply the Sensor Correctly
Most sensors go on the back of your upper arm. Clean the area with alcohol first and let it dry completely. Press the applicator firmly against your skin-the insertion happens automatically and feels like a quick pinch.
For athletes, sensor placement matters more than for sedentary users. Avoid placing it where:
- Your arm contacts your body during swimming
- Tight compression sleeves will rub against it
- Heavy sweating pools (varies by person)
Cover the sensor with an adhesive patch designed for sports. Brands like Simpatch or Rockadex make overlays that keep sensors attached through sweat, swimming, and contact.
Step 3: Establish Your Personal Baseline
Don’t change anything for the first 3-4 days. Eat normally - train normally. Sleep normally.
You need baseline data before making adjustments. Watch for:
- Your fasting glucose when you wake up
- How different meals affect your curve
- What happens during various workout intensities
- Your glucose pattern during sleep
Most non-diabetic athletes see fasting glucose between 70-100 mg/dL. During rest, glucose typically stays in a narrow band. Exercise changes everything.
Interpreting Your Training Data
Here’s where things get interesting-and where most people misread their numbers.
During Low-Intensity Work
Zone 2 training (easy aerobic pace) should show relatively stable glucose or a gradual decline. Your body burns a mix of fat and glucose, and the demand doesn’t outpace supply. If you see glucose dropping rapidly during easy sessions, you might be underfueled going in.
During High-Intensity Intervals
Expect glucose to rise, sometimes dramatically. This counterintuitive spike happens because your liver dumps stored glycogen in response to stress hormones. A glucose reading of 140-160 mg/dL during hard intervals is completely normal for a healthy athlete.
Don’t panic and don’t eat more. This is your body doing exactly what it should.
The Post-Workout Window
After hard training, glucose often drops below your baseline. This is when your muscles are actively pulling glucose from your blood to replenish glycogen stores. Eating carbohydrates during this window results in less of a spike because the glucose has somewhere to go immediately.
Track how long this enhanced uptake lasts for you personally. For some athletes it’s 30 minutes. For others, 2 hours.
Optimizing Your Fueling Strategy
Pre-Workout Nutrition
Test different foods and timing before workouts. You’re looking for fuel that:
- Provides energy without a steep spike-and-crash
- Digests comfortably during movement
- Keeps glucose available when you need it
Start by eating your normal pre-workout meal and noting your glucose response. Then experiment:
- Try eating 30 minutes earlier or later
- Swap simple carbs for complex ones (or vice versa)
- Add protein or fat to slow absorption
- Test different portion sizes
One athlete might perform best with oatmeal two hours before training. Another might need a banana 20 minutes out. The CGM reveals your individual response.
During-Workout Fueling
For sessions under 60-75 minutes, most athletes don’t need additional fuel. But longer efforts require it. The CGM helps you find your intake sweet spot.
Watch what happens when you take in carbohydrates mid-workout:
- Does glucose rise appropriately and stabilize? - Does it spike then crash? - How long before you see the intake reflected in your numbers?
Most sports nutrition products take 15-20 minutes to affect glucose levels. Knowing your personal lag time prevents the common mistake of over-consuming because you “don’t feel anything yet.
Recovery Nutrition
The old advice about slamming carbs immediately post-workout gets more nuanced with CGM data. Yes, your muscles have enhanced glucose uptake after training. But the optimal amount and timing varies.
Some athletes do better with moderate carbs right after, then a larger meal an hour later. Others benefit from a bigger immediate refeed. Test both approaches. Your glucose curve will show which one keeps you stable and recovered.
Common Mistakes and How to Fix Them
Mistake: Chasing a flat line
Some athletes become obsessed with keeping glucose perfectly stable. But glucose is supposed to fluctuate. It rises when you eat and during intense exercise. It falls during fasting and easy movement. A completely flat line would indicate a problem, not optimal health.
Aim for smooth waves, not a flatline.
Mistake: Eating to prevent every dip
Seeing glucose trend downward triggers an urge to eat. Resist it. If you’re not exercising and not feeling hypoglycemic symptoms (shakiness, confusion, sweating), a dip into the 70s is fine. Your body will mobilize stored energy.
Constantly eating to prevent dips keeps your glucose elevated and prevents metabolic flexibility.
Mistake: Ignoring sleep data
Nocturnal glucose patterns reveal a lot about recovery and overall health. Poor sleep often shows up as unstable overnight glucose. Elevated glucose during sleep might indicate inadequate recovery from training.
Check your overnight data, especially after hard training days.
Mistake: Making too many changes at once
Change one variable at a time. If you simultaneously switch your pre-workout meal, try a new sports drink, and adjust your meal timing, you won’t know what’s actually affecting your glucose response.
Be methodical. Test one change for at least a week before adding another.
Is This Technology Worth It?
Honest answer: it depends on your goals and budget.
For competitive athletes looking for marginal gains, CGM data can reveal fueling errors that hurt performance. Finding out that your current pre-race meal causes a glucose crash at mile 15 is valuable information.
For recreational athletes, the cost might not justify the benefits. You can dial in nutrition pretty well through feel and simple experimentation. A CGM accelerates that process but isn’t mandatory.
But there’s a middle ground. Using a CGM for 2-3 months to learn your patterns, then stopping once you understand your body’s responses. This “educational” approach gives you lasting knowledge without ongoing expense.
Whatever you decide, remember that the technology provides data-not answers. The real work is interpreting that data, making smart adjustments, and testing whether those changes actually improve your performance.