Hip Hinge Mastery: The Movement Pattern Everyone Gets Wrong

You’ve probably seen it a hundred times at the gym. Someone loads up a barbell, bends over to grab it, and rounds their lower back into a shape that makes your spine hurt just watching. The deadlift gets blamed for countless back injuries, but here’s the truth: the exercise isn’t the problem. The hip hinge pattern is.
Most people never learned how to hinge properly. We sit all day, our glutes forget how to fire,. When we finally try to pick something heavy off the floor, our bodies default to the path of least resistance. That path usually involves your lumbar spine doing work it was never designed to do.
Let’s fix that.
What Actually Happens During a Hip Hinge
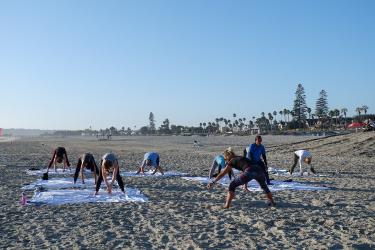
The hip hinge is a fundamental movement where your hips travel backward while your torso tilts forward. Your spine stays neutral. Your knees bend slightly but don’t travel forward much. The movement happens primarily at your hip joint, not your lower back.
Think about closing a car door with your hands full. You bump it with your hip, right? That backward hip movement is the foundation we’re building on.
Your posterior chain-glutes, hamstrings, and spinal erectors-does the heavy lifting. When this pattern works correctly, these muscles absorb force and generate power. When it breaks down, your lower back takes the hit.
Step 1: Find Your Hip Crease
Stand with your feet hip-width apart. Place your fingers right where your thighs meet your torso. That crease is your hip joint, and it’s where all the movement should originate.
Now push your hips straight back. Your fingers should get pinched between your thigh and torso. If they don’t, you’re probably bending your knees too much or rounding your back.
Why this matters: Most people initiate the movement by bending their knees or flexing their spine. Both patterns shift load away from your powerful hip muscles and onto structures that can’t handle it well.
Step 2: Master the Wall Touch Drill
Stand about six inches from a wall, facing away from it. Keep your feet shoulder-width apart.
- Place a broomstick or PVC pipe along your spine, holding it with one hand behind your head and one at your lower back
- The stick should touch three points: back of your head, upper back, and tailbone
- Push your hips back until your glutes touch the wall
Here’s what to watch for: The stick should maintain contact with all three points throughout the movement. If your head pulls away, you’re looking down. If your lower back loses contact, you’re rounding. If your tailbone pulls away, you’re overarching.
Once you can do this easily at six inches, move further from the wall. Work up to 12-18 inches. At that distance, you’re achieving the hip travel needed for exercises like deadlifts and kettlebell swings.
Step 3: Add the Knee Unlock
A proper hip hinge isn’t a stiff-legged movement. Your knees should have a soft bend-about 15-20 degrees of flexion.
Too much knee bend turns the movement into a squat. Too little puts excessive stretch on your hamstrings and often causes lower back rounding as compensation.
Try this cue: “Unlock your knees, then forget about them. " The hip hinge is a hip-dominant pattern. Your knees accommodate the movement but don’t drive it.
Step 4: Engage Your Lats
Your latissimus dorsi muscles connect your arms to your pelvis. When engaged, they create tension that helps stabilize your spine during the hinge.
Before you hinge, pull your shoulders down and back, like you’re tucking them into your back pockets. Imagine bending a bar around your thighs. You should feel tension across your upper back.
This lat engagement becomes critical when you add load. Without it, the weight pulls your shoulders forward, your upper back rounds, and the whole movement falls apart.
Step 5: Brace Your Core (The Right Way)
Forget about sucking in your stomach. That actually destabilizes your spine.
Instead, take a breath into your belly, then brace like someone’s about to punch you in the gut. Your midsection should feel solid on all sides-front, back, and both flanks. This creates intra-abdominal pressure that supports your spine from the inside.
Maintain this brace throughout the entire movement. Breathe out at the top, rebrace, and go again.
Common Mistakes and How to Fix Them
Mistake 1: Looking up during the lift
People often crane their neck back, thinking it helps keep their chest up. But it actually creates cervical extension while you’re trying to maintain a neutral spine. Your neck is part of your spine. Keep your chin tucked slightly and pick a spot on the floor about 10 feet ahead to focus on.
Mistake 2: Letting the knees cave inward
Weak glutes often show up as knee valgus during the hinge. Your knees should track over your middle toes. If they collapse inward, reduce the weight and add some single-leg glute work to your routine. Clamshells, lateral band walks, and single-leg hip thrusts all help.
Mistake 3: Hyperextending at the top
The movement ends when your hips are fully extended and you’re standing tall. Shoving your hips forward past neutral and leaning back doesn’t prove you finished the lift-it just compresses your lumbar spine. Stand straight - squeeze your glutes. That’s it.
Mistake 4: Rushing the eccentric
The lowering phase builds strength and control. Dropping quickly into the bottom position usually means you’re losing tension. Take two to three seconds on the way down. You’ll feel the difference immediately in your hamstrings.
Progressing the Pattern
Once you own the bodyweight hinge, progress thoughtfully:
Romanian Deadlift with light dumbbells - Start with 10-15 lb weights held at your sides. This adds load while keeping the pattern simple.
Kettlebell Deadlift - The weight between your feet reinforces proper hip mechanics. It’s harder to mess up than a barbell.
Conventional Barbell Deadlift - Now you’re ready. But keep the weight modest until the pattern feels automatic.
Single-Leg Romanian Deadlift - This exposes asymmetries and builds the stability you need for athletic performance.
Don’t rush through these progressions. I’ve seen people spend months on step one and end up stronger for it.
When Something Feels Off
Pain during a hip hinge usually points to one of three issues:
Lower back pain: Almost always a neutral spine problem. Go back to the dowel drill and check your positions. Sometimes tight hip flexors pull the pelvis into anterior tilt, making neutral harder to find. Add hip flexor stretches to your warmup.
Hamstring cramping: You’re probably using your hamstrings too early in the movement. The glutes should initiate hip extension. Try squeezing your glutes hard at the top of each rep to reinforce their role.
Knee pain: Check your foot pressure. You should feel weight through your whole foot, maybe slightly biased toward your heels. If you’re on your toes, the mechanics are off.
The Payoff
A solid hip hinge transfers to everything. Picking up your kid, loading groceries into the car, shoveling snow-these everyday activities all use this pattern. Get it right in the gym, and you’re building injury resilience for life.
And in training? A good hinge unlocks serious strength development. Your posterior chain is capable of moving heavy weight safely. You just need to teach it how.
Start with the wall drill today. Five minutes of practice before your workout. Do it for two weeks. The pattern will start to feel natural, and you’ll wonder how you ever moved any other way.