Weighted Vest Training: Safe Progressions for Beginners
You’ve probably seen people walking around your gym or neighborhood with a weighted vest strapped on. Maybe you’ve wondered if adding one to your routine makes sense. The short answer? Yes, but only if you approach it correctly.
Weighted vests amplify the demands on your body during movement. That’s the whole point. But this amplification cuts both ways-done right, you build strength and endurance; done wrong, you strain joints and set yourself back weeks.
Why Weighted Vests Work
Your body adapts to stress. Walk the same route at the same pace for months, and eventually your cardiovascular system stops improving. Your muscles plateau - you’re maintaining, not progressing.
Adding external load forces adaptation. A 10-pound vest increases the work required for every step, every squat, every push-up. Your heart pumps harder. Your legs push against more resistance. Bones respond to increased mechanical stress by becoming denser.
Research from the Journal of Strength and Conditioning found that weighted vest training improved sprint times and vertical jump height in athletes after just six weeks. For everyday fitness, the benefits translate to better walking endurance, stronger legs, and improved posture muscles.
But but: those benefits only materialize if you progress sensibly.
Start Lighter Than You Think
Most beginners grab a 20-pound vest because it feels challenging. Don’t do this.
Start at 5% of your bodyweight. If you weigh 160 pounds, that’s 8 pounds. Feels easy - good. That’s the point.
Your muscles might handle heavier loads immediately. Your connective tissue-tendons, ligaments, cartilage-won’t. These structures adapt 3-4 times slower than muscle. Rush the process and you’re looking at knee pain, hip discomfort, or worse.
Week 1-2 Protocol:
- Wear the vest during normal walks only
- Keep sessions under 20 minutes
- Walk on flat terrain
- Use 5% of bodyweight maximum
After two weeks without joint pain or unusual fatigue, you’re ready to progress.
The 10% Rule for Adding Weight
Increase vest weight by no more than 10% per week. Started at 8 pounds? Move to 9 pounds in week three. Sounds painfully slow - it is. It also keeps you training consistently instead of nursing an injury.
Some vests use small weight increments (0. 5-1 pound plates). These are worth the extra cost. Vests with 2. 5 or 5-pound minimum jumps force larger progressions than ideal.
Safe Progression Timeline:
| Week | Bodyweight % | For 160 lb Person |
|---|---|---|
| 1-2 | 5% | 8 lbs |
| 3-4 | 5. 5% | 9 lbs |
| 5-6 | 6% | 10 lbs |
| 7-8 | 6. 5% | 10. |
Most recreational exercisers top out around 10-12% of bodyweight. Going heavier provides diminishing returns and increased injury risk for non-athletes.
Matching Activities to Your Experience Level
Not all exercises pair equally well with weighted vests, especially early on.
Start Here (Weeks 1-4):
- Flat-ground walking
- Gentle hiking on established trails
- Standing core work
- Wall push-ups
These activities place minimal impact stress on joints while your body adapts to the additional load.
Add These Next (Weeks 5-8):
- Incline walking (treadmill or hills)
- Bodyweight squats
- Lunges at slow tempo
- Standard push-ups
- Stair climbing
Advanced Options (After Week 8, if pain-free):
- Light jogging intervals
- Box step-ups
- Pull-ups
- Burpees (careful with these)
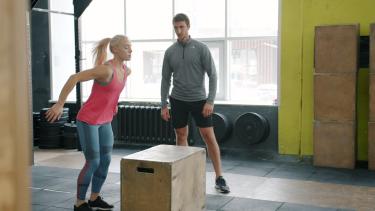
Notice what’s missing from every list? High-impact plyometrics. Jumping with a weighted vest multiplies ground reaction forces dramatically. Save box jumps and jump squats for athletes with specific training goals and proper coaching.
Fit Matters More Than Weight
A poorly fitting vest creates problems no progression plan can solve.
The vest should sit snugly against your torso without bouncing during movement. Shoulder straps need padding-you’ll feel raw spots quickly otherwise. Weight distribution should favor the front and back of your torso, not hang off your shoulders.
Before your first session, adjust every strap while standing, then walk around your house for five minutes. Bounce lightly in place. Any rubbing, sliding, or pressure points need addressing before you head outside.
Look for vests with:
- Multiple adjustment points (shoulders, sides, waist)
- Weight pockets distributed across the torso
- Breathable mesh material
- Reflective elements if you walk near roads
Cheap vests from discount stores often use rigid plates that dig into ribs or shift during movement. Spending $60-100 on a quality vest prevents a lot of frustration.
Warning Signs to Watch For
Push through muscle fatigue - don’t push through joint pain.
Stop your session immediately if you experience:
- Sharp pain in knees, hips, or ankles
- Lower back pain that worsens with each step
- Shoulder discomfort from strap pressure
- Numbness or tingling in arms or hands
- Dizziness or unusual shortness of breath
Mild muscle soreness 24-48 hours after training is normal and expected. Pain during activity or soreness lasting beyond 72 hours suggests you’ve progressed too quickly.
When in doubt, drop back to the previous week’s weight and extend that phase by another week. Patience beats physical therapy bills every time.
Building Your First 8-Week Program
Here’s a practical schedule to follow:
Weeks 1-2: Foundation Three sessions per week, 15-20 minutes each. Walking only on flat surfaces - use 5% bodyweight.
Weeks 3-4: Extending Duration Three sessions per week, 25-30 minutes each. Add gentle inclines - increase to 5. 5% bodyweight.
Weeks 5-6: Adding Exercises Four sessions per week. Two walking sessions (30 minutes) and two bodyweight strength sessions (20 minutes of squats, lunges, push-ups). Use 6% bodyweight.
Weeks 7-8: Integration Four sessions per week. Combine walking with bodyweight exercises in single sessions. Begin with 10-minute vest walk, perform strength circuit, finish with 10-minute vest walk. Progress to 7% bodyweight.
After eight weeks, reassess your goals. Want more cardiovascular challenge? Increase walking duration or add hills before adding weight. Want strength gains? Add more exercises before going heavier.
Common Mistakes That Stall Progress
**Wearing the vest all day - ** Your body needs recovery. Constant low-level stress without adequate rest leads to chronic fatigue, not adaptation. Keep vest work to dedicated training sessions.
**Ignoring posture changes. ** Extra weight pulls shoulders forward if core muscles fatigue. When you notice yourself hunching, the session is over. End early rather than reinforce poor movement patterns.
**Skipping warm-up. ** Walk without the vest for 5 minutes before adding load. Your joints need movement and blood flow before handling extra stress.
**Combining with other new variables. ** Started weighted vest training this week? Don’t also increase running mileage, add a new sport, or cut calories dramatically. Isolate variables so you can identify what’s working and what’s causing problems.
Making It Stick
The best training program is one you’ll actually follow. Weighted vest training works because it slots into activities you’re already doing. Walking the dog becomes a workout. A lunch break stroll turns into progressive resistance training.
Start your first session tomorrow. Grab whatever vest you have access to, load it light, and walk for fifteen minutes. Notice how it feels - adjust the fit. Walk again the next day.
Progression happens one session at a time. Eight weeks from now, you’ll handle loads that feel impossible today. But only if you start easy enough to stay consistent.
Your joints will thank you for the patience.